Why Did I Write a Gameboy Color Image Decolouriser?
Come read about how I created this tool to more cleanly import Gameboy Color images as backgrounds in GB Studio because sometimes the colour definition gets lost when using the GB Studio tools.

The Short Version

Like explained in the excerpt at the top, GB Studio doesn't properly import coloured images even though it has support for colour. I created this tool to keep the 4 colour per tile fidelity, making it easy to import and colour the image in GB Studio.
Head over to the GitHub repo: Gameboy Colour Decolouriser and check it out:
 nikouu
✨Enjoy!⭐ Or stay around for the gifs and story telling below...
The Fun Version
Let's deep dive into the project. If you've read the repo readme, the following will be pretty familiar.
Why even do this?
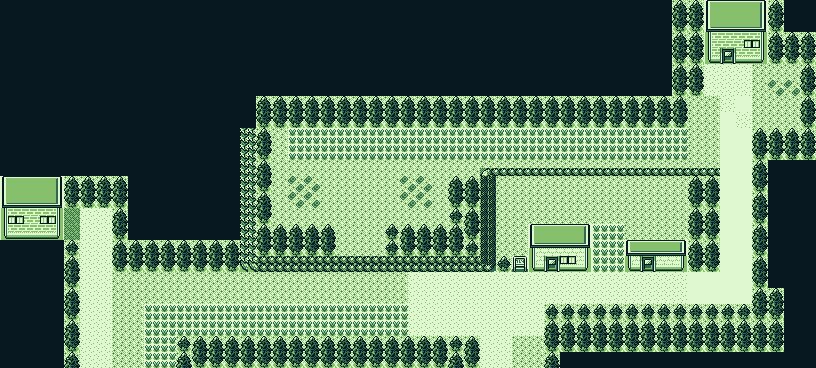
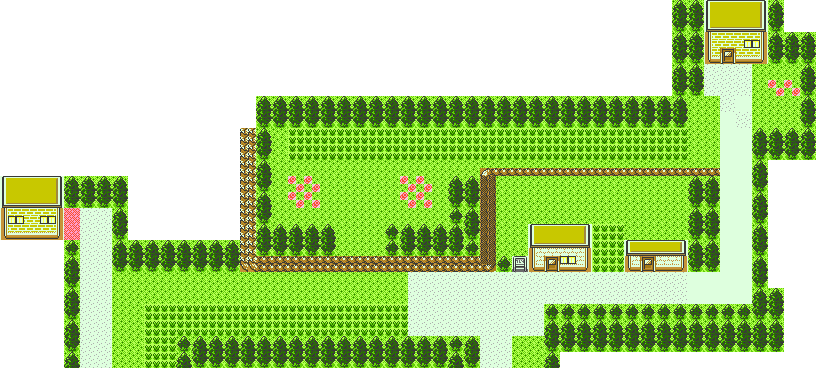
GB Studio does not properly import coloured images. It's obvious with an example where we'll compare the original colour image, the GB Studio version, and the version from this project, GameboyColour Decolouriser:
| Created From | Resulting Image |
|---|---|
| Original Colour | 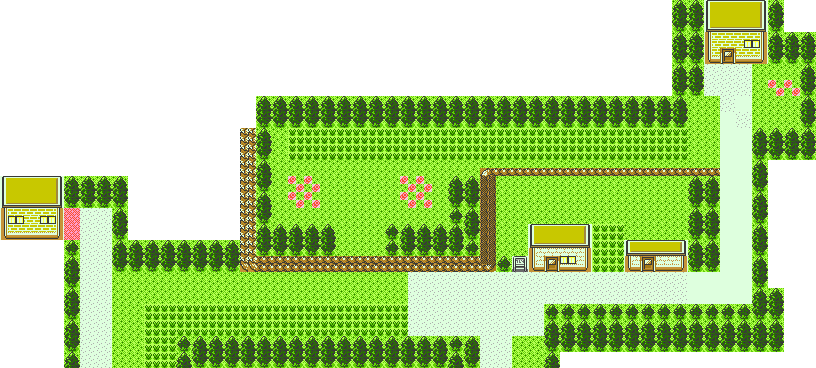 |
| GB Studio | 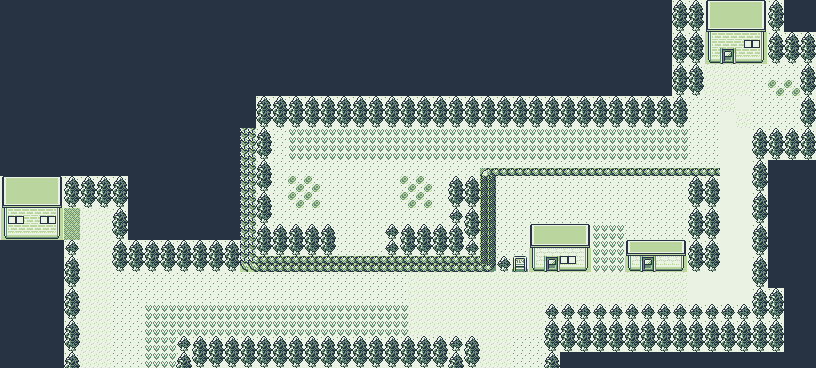 |
| GameboyColour Decolouriser |  |
Ignoring that the actual 4 colour palettes are slightly different (i.e. different shades of green) it still stands that the GB Studio version does not keep the original image fidelity. There is some sort of approximation of colour across the entire image and not per tile. This is easy to see if we zoom right into some of the detail:
| Detail | Original | GB Studio | Decolouriser |
|---|---|---|---|
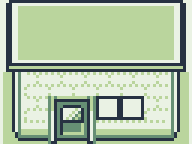
| Building | 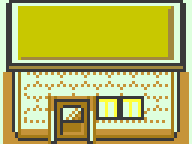 |
 |
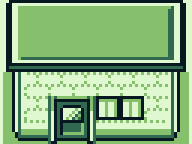 |
| Grass |  |
 |
 |
| Tall Grass |  |
 |
 |
See how in GB Studio:
- Building roof shading is lost
- Building window colours are gone
- Grass has been reduced to two colours
- Tall grass has been reduced to two colours
To keep fidelity of the shading is the goal of this project and in these comparisons, it does a good job.
Four colours only
The Gameboy and Gameboy Color both use 8x8px squares as tiles or sprites. Due to the limitation of the hardware each 8x8 tile can only contain a maximum of four colours. In the case of the original Gameboy, it was from any of the four greens and in the case of the Gameboy Colour, it could be any of the colours available, but only a selection of 4 per tile too. There are other limitations when we consider the whole screen and sprites, but that's out of scope here. If you're interested further checkout this: How Graphics worked on the Nintendo Game Boy by MVG for a somewhat technical but still easily consumed video.
This encompasses the core technical problem: How do you know what four Gameboy greens to map to true colour Gameboy Colour colours?
It sounds easy at first because you just obviously map the brightest true colour to the lightest Gameboy shade and keep going that way. But if we just think of brightness, we could have problems like:
- There are different ways to measure brightness which can lead to odd result
- A darker blue on a specific tile might be the darkest for that tile, but it could be the second darkest for another tile. What Gameboy shade applies to this dark blue?
Considering each tile individually and using the constraints of having 4 colours per tile is how the project works. It does not take in a whole image to approximate and flatten the colours, like in GB Studio.
How does it work?
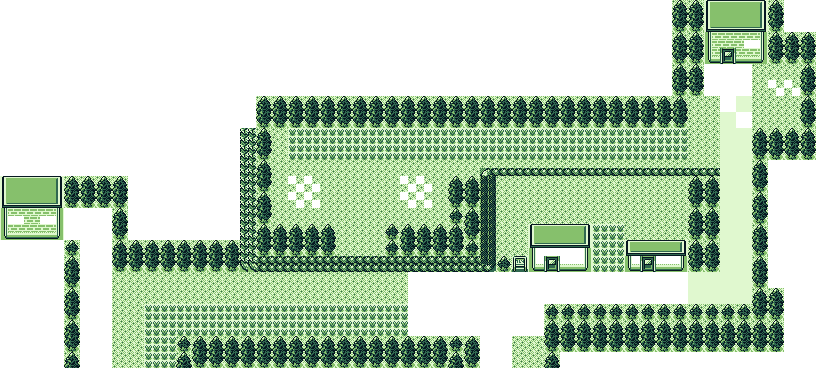
We'll use this image as our Gameboy Color example to decolourise:

While the program has been through a few iterations, it works by doing several passes over each tile of the image and forming reasoning around what true colour maps to what Gameboy colour. These passes are the core workings of the GameboyColour Decolouriser and they are:
1. Recolour based on four colour tiles
This is the easiest step. Four colour tiles leave no guesswork on how each true colour maps to a Gameboy colour. Just order both true colours and Gameboy colours by brightness and marry them together.
We can then begin to reason with three colour tiles that are a subset of the four colour tiles. If the three true colours are all the same as any three inside a four colour tile, we can directly map those true colours in the three tile to the Gameboy shades of the four colour.
Then so for two and one colour tiles.
As long as there is a decent amount of four colour tiles, a good chunk of the image can be colourised this way. For example, the image above ends up being coloured like so:
The tiles that haven't been resolved contain colours that aren't in any of the four colour tiles. Taking an example from the original image, the gravelly road has a grey and a white. While the white exists in other tiles, the grey isn't present in any of the four colour tiles - meaning we can't yet colour the gravelly road. Yes the grey exists elsewhere, but no where does the grey and white exist in the same four colour tile. Similarly with the windows there is a bright yellow that only appears in the windows and in no four colour tiles.
2. Recolour based on transparent tiles
PNGs are great when working with pixel-based projects, and working with a Gameboy is no different. However while the programs we use might easily understand transparent pixels, a Gameboy doesn't (for our background case). Meaning we need to replace the transparent pixels. For this, GameboyColour Decolouriser will convert any transparent pixel into the darkest Gameboy shade. I've found that transparent pixels are often the "void", or the bits outside of the playable area and since Pokémon does that, this does the same (check it out next time you're inside a small building).
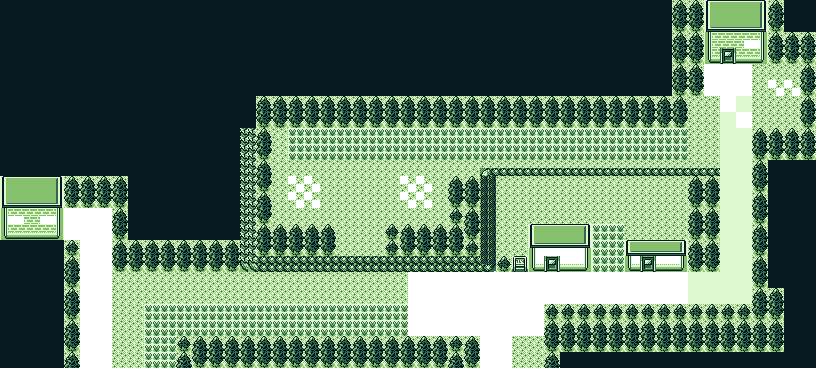
Note that the insides for the paths, windows, and flowers are still transparent - this is because those have yet to be processed.
3. Recolour based on existing tile colours
Previously in step 1, we just focused on four colour tiles and their full subset children. Now we'll do some estimating. Remember that gravelly road before? We'll now try to guess out what shade of green the grey maps to, and that works like this:
- Take a global image dictionary of each true colour and corresponding Gameboy colour
- Weight each true colour/Gameboy colour based on which true colour has the most Gameboy colours. Note: This is the first bit of guesswork and could be a source of problems. Depending on the image, a true colour could map to several Gameboy colours depending on the make up of that true colour tile. See the example earlier about a dark blue colour.
- When a true colour is found in the dictionary, paint that pixel with the corresponding most-weighted Gameboy colour.
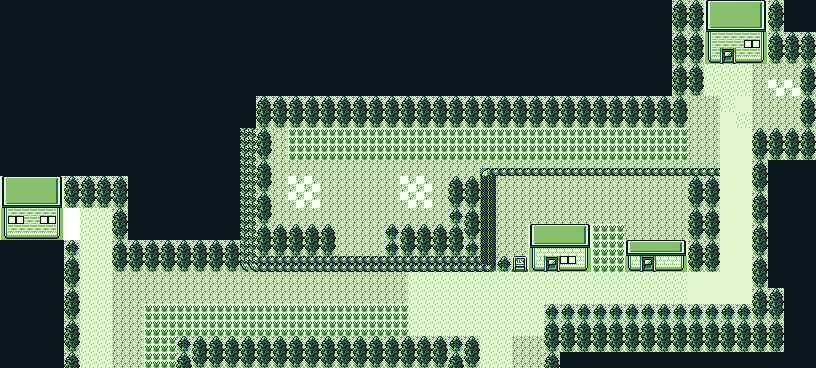
Here we see more of the image filled in. Things like:
- The gravel paths are filled in because the whiter shade already existed in the non-gravel paths and the original grey was found in the sign
- The buildings and windows (minus the bright yellow) are filled in
4. Recolour based on nearest similar colours
This is the biggest guesswork step. We get to this here when there are unique colours not found in any four colour tiles. For this step the process is:
- Take the weighted global dictionary of colours and order from brightest to darkest.
- For each tile with an unmapped colour
- Get the brightness of the unmapped colour
- Find the closest brightness of another true colour in the global dictionary that has already been mapped
- Map the unmapped colour to the Gameboy colour of the closest true colour brightness
- Add the new mapping to the global dictionary
While this does have some guesswork, it has proven good enough for my purposes so far.
And that's how we get the final image from Gameboy Color to Gameboy:
Where To Next?
Tests and edge case tweaking is the short story. Maybe by the time you're reading this, that's already done! Woohoo!
But looking further ahead: Being able to import a crisp GBC -> GB background is great, but then you have to use the palette function to colour it all over again. What if you could automatically import coloured images into GB Studio? At the time of writing this, there is no such feature but there is an open GitHub issue: Auto-color background PNG files when imported #705. Maybe I should write a tool for this too... 🤔