How to Run a Raspberry Pi Zero 2 W Headless
By adding two files onto the boot sector for the Raspberry Pi you can easily start a completely wireless experience either through PuTTY or with a little more effort, VNC. This post will show you how with a Pi Zero 2 W.

😍
After writing this post, version 1.7 of the Raspberry Pi Imager released allowing you to set the headless SSH as part of the SD card imaging - essentially skipping the "Headless for SSH" step below!
We've got two parts coming up:
- Headless for just SSH (skippable with v1.7 of the Raspberry Pi Imager)
- Headless for VNC (like Remote Desktop)
Headless for SSH

- Make sure you've already imaged your SD card. Check out this post for the how to.
- In the boot partition of the SD card create an empty file just called
ssh - Also in the boot partition, create a file named
wpa_supplicant.confand throw the following into it (with your own Wi-Fi name and password):
country=US
ctrl_interface=DIR=/var/run/wpa_supplicant GROUP=netdev
update_config=1

network={
    scan_ssid=1
    ssid="wifi_name"
    psk="wifi_password"
}
Note: The Zero 2 W is 2.4GHz only.
Headless for VNC
Setting up VNC on the Pi

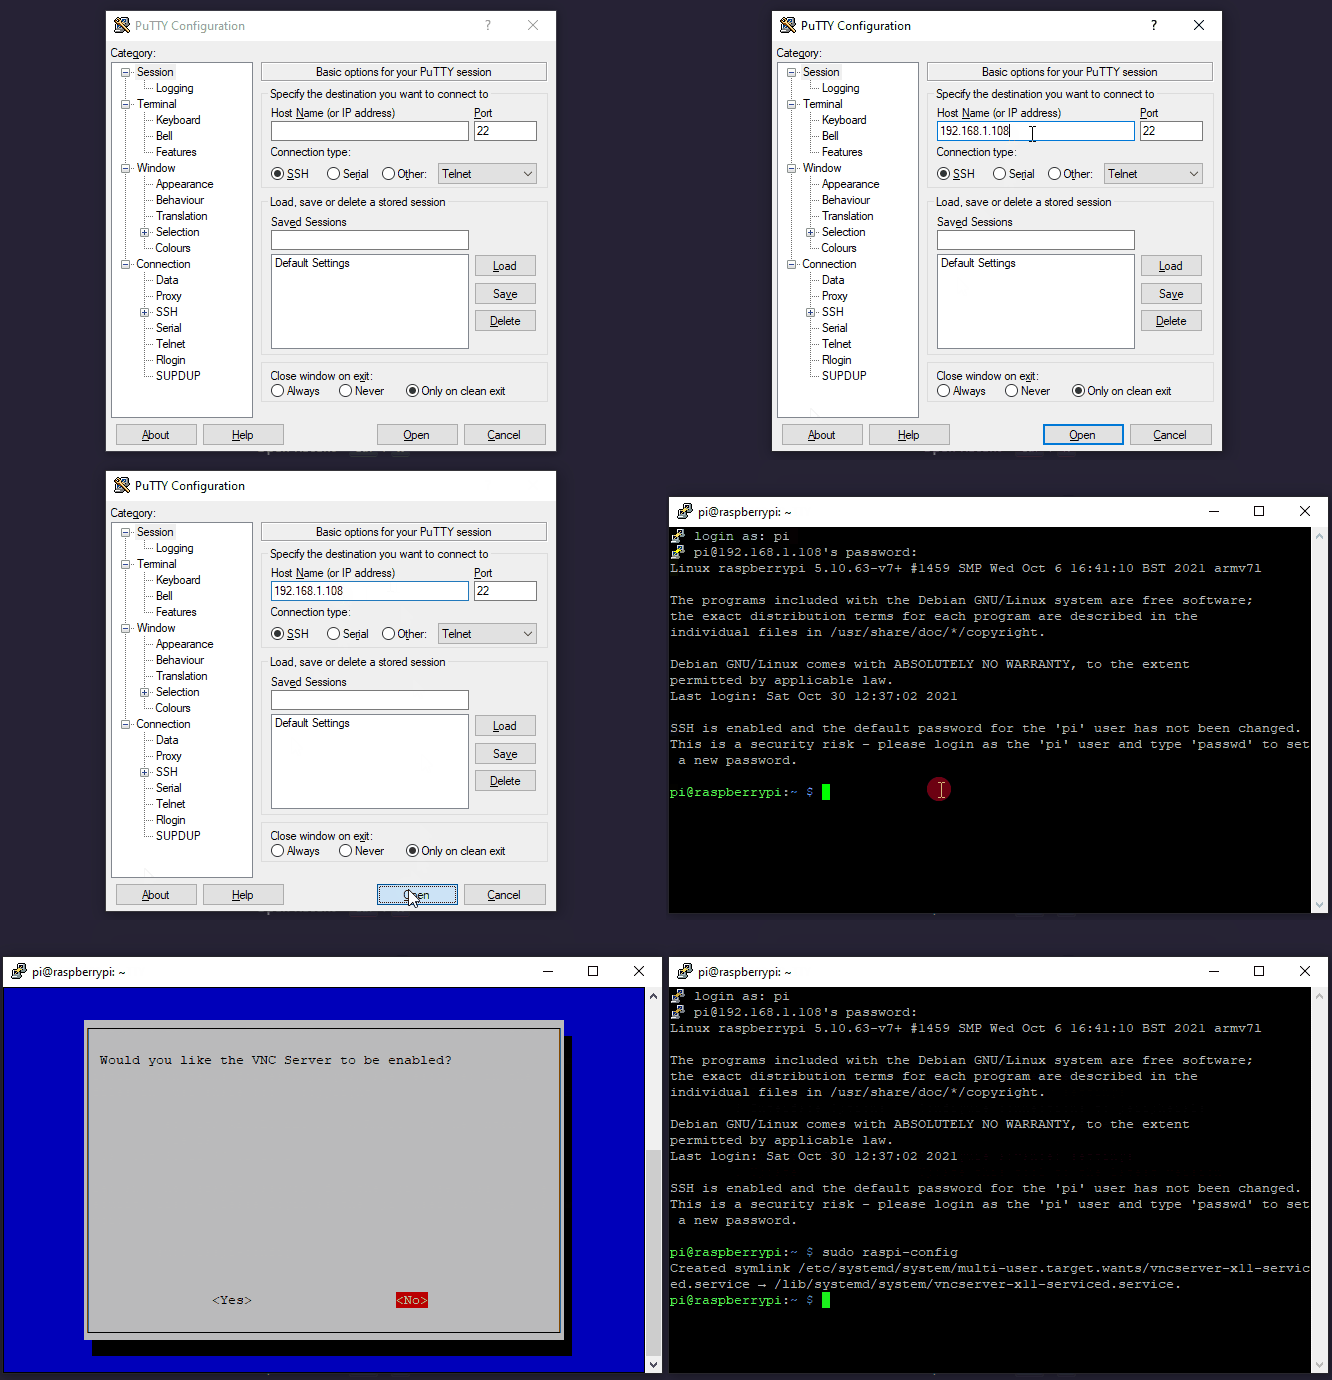
- Open PuTTY (or similar)
- SSH to your Pi. See just below for defaults
- Run
sudo raspi-configto bring up the configuration menu - Scroll down to "3 Interface Options"
- Enable "P3 VNC" or "I3 VNC" (depending on version)
Default username and password for the Pi:
username: pi
password: raspberry
Doing the above looks like:
Setting up VNC on your PC

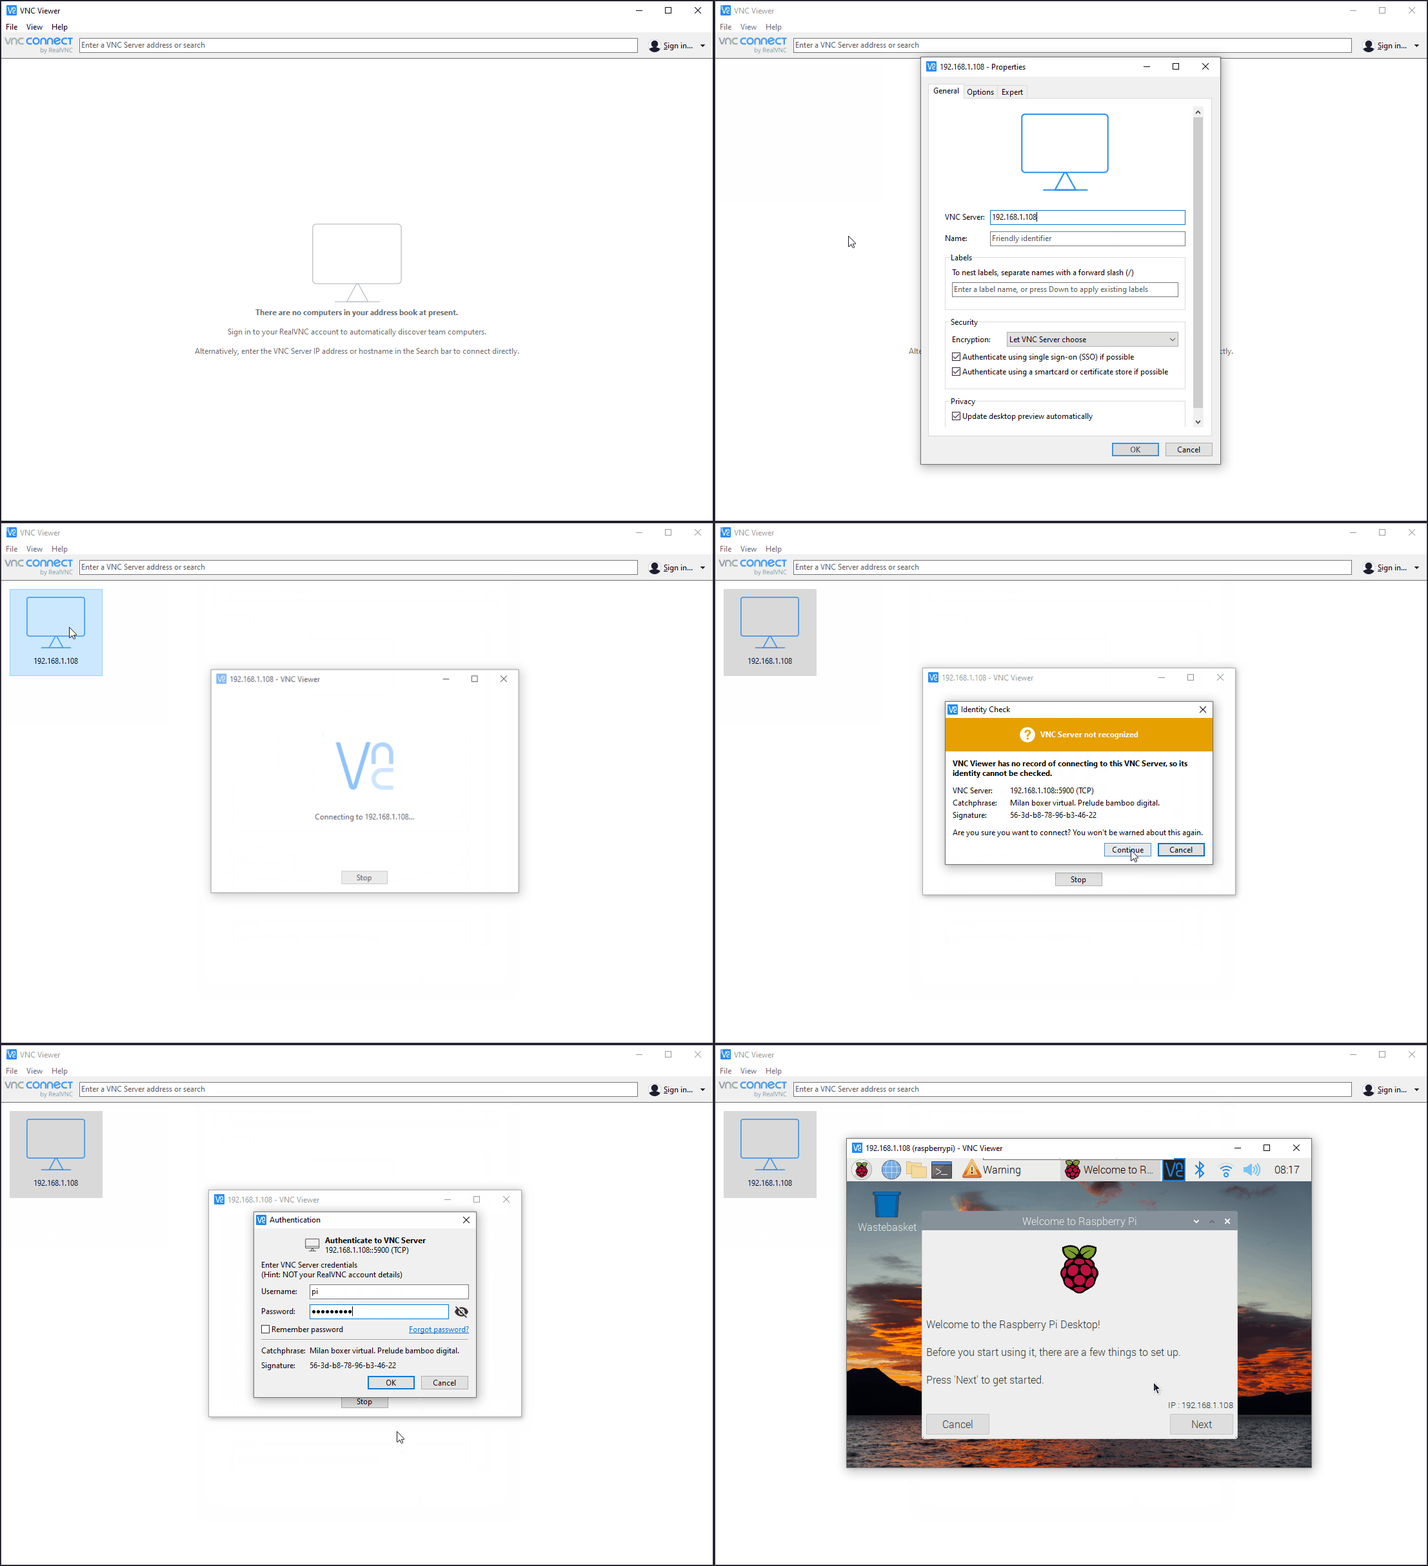
- Download and install VNC Viewer
- Add a new connection to your Pi's local IP address
- Click on the connection
- Enter the username and password
For more nitty gritty Pi setup, see the official documentation:
Raspberry Pi Documentation - Configuration
The official documentation for Raspberry Pi computers and microcontrollers
